So it is Christmas Cookie Baking weekend! Adding my recipes to my blog in case the program I am using (Plan to eat) goes away. I have no clue who Aunt Lucy is, but bless her soul!!!!
Taken from the Who Wants Candy Book by Jane Sharrock
Course: Desserts
Cuisine: American
Serves:1
Ingredients
3 cupspeanuts, raw unsalted
2 cupssugar
1 cupCorn Syrup, light
1⁄2 cupwater
1 cupbutter
1 teaspoonsbaking soda
Directions
Butter 2 large baking sheets. If using large nuts, cur or break the nuts into smaller pieces.
In a heavy 5-quart kettle over medium heat, bring the sugar, corn syrup and water to a boil, stirring until the sugar dissolves and the mixtures begins to boil.
When the mixture reaches a full, rolling boil, stir in the butter until melted. Reduce the heat slightly to medium low, maintaining a medium boil. Cook, stirring frequently, to the soft crack stage (280 F)
Sit in the nuts. Cook, stirring frequently, to the hard crack stage (300F)
Remove from the heat. Stir in the baking soda until well blended. Quickly put the mixture onto buttered baking sheets, spreading evenly across both pans. If desired, use two forks or the back of the spoon to spread the candy into the extra thin layer. Cool and break into pieces. Store in an airtight container.
“In order to make an apple pie from scratch, you must first invent the universe.” ~ Carl Sagan
In the month of October Craftsy had a great deal where you could watch any class for the entire month for 9.99. I grabbed the deal and watched video after video. Two of the classes I watched were Pie Making.
The Perfecting the Pie Crust was very detailed and went into great detail. Makes you a little nervous thinking “Can I do this….sounds like surgery”
The Classic Pies Made Easy course was more reassuring. I felt like it could actually make a pie
But it is now November. Those classes are gone off my Craftsy platform. And I remember nothing. Oh how I would love to have that free access again.
Why oh why did I say I would make a pie for Thanksgiving.
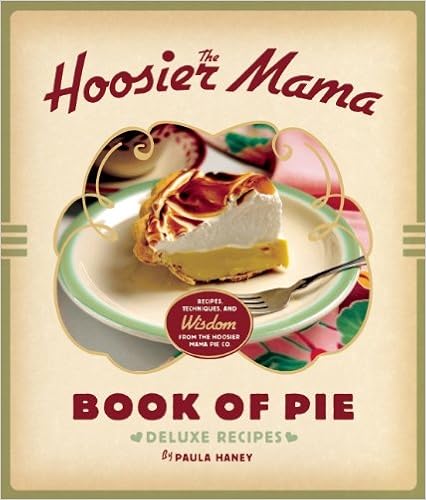
But I did buy The Hoosier Mama’s pie book. Wow! This book has detailed pictures every step along the way.
I decided to make a Apple, Pear and Cranberry Pie with Pecan Crumble Topping.
Am I insane.
Yes
I kept thinking I should be able to do this, I am a decent cook, I have made Jam, I have made chinese food, I learned how to make dim sum and Thai Food. I am woman, I am strong.
I am also kinda bad at this pie thing. I really hope it turns out, because it is for Thanksgiving.
I did tell my sister to have a back up dessert in case it sucks big time.
So it started with 4 cups of Apples and 4 cups of Pears cut up. So exactly how many pears and apples would that be, and what kind of pears and Apples…wait! Why am I doing this again.
So I bought Granny Smith apples and the only pears they had there. Were they suppose to be firm or really ripe. Again I have no clue what I am doing.
The Crust
I decided to make the crust and the filling the night before.
I am so funny. I actually thought I could do that.
I could only make the pie dough.
I kept thinking about the woman saying “Make sure you do not add too much water”. I was paralyzed by that thought. I was confident. I knew I could do this.
Then I made the mistake of watching a youtube video.
This sweet Grandmother made a comment about people should be horsewhipped for telling people to not add water.
Crap!
I am so confused. Water….no water….
So I followed the book. My gut tells me it was a little dry.
Oh by the way if you have the Pampered Chef pastry cutter please throw it away. I used it and it hurt so much. It should have been called the Pampered Chef Pastry and Hand Cutter. Maybe my hands are too big (I think not) but that stainless steel kept cutting into my hands. It hurt. It hurt a lot. And yes I was holding it the right way…. I can imagine you thinking I am holding it by the multiple blades side. LOL But there were sharp edges on the handle and my hands still hurt this morning. Don’t get me wrong I like The Pampered Chef, maybe I got the discontinued model. I think I need one with more of a comfortable handle.
All I can say is thank God I have a marble countertop (or is granite), it made rolling out the dough so much easier.
I think the cracked edges mean that it is too dry…am I paranoid or what?
OK, I will move past this issue (not really)
I finally got the crust into the pie plate and did my crimping. LOL, what a lousy job. But I did watch the video from the Hoosier Mama owner and she said “Don’t worry, it took me a month to get it down right”
So following the instructions I froze the pie for a while to get it nice and chilled and then added the pinto beans into the pie to bake
PINTO BEAN PIE ANYONE!!!
Ok the shell is baked…it does not look too bad. My crimping sucks. But then again the nice Hoosier Mama woman said it takes time and practice. Yup it sure does.
So now onto the filling
The Pie Filling
Like I said earlier I bought Granny Smith apples and some sort of green pears.
Now anyone who knows me, know I buy crap off of QVC I don’t need. Those nice people at QVC talk in a soothing voice that makes me believe I MUST have what ever they are selling. I admit I have bought stuff that really I should have passed over. We are all like that. But one item I bought was an apple peeler. It was not expensive and I was thinking “One day I will make a pie” Well that day has arrived.
This cheap little beauty cuts off those peels in a less than a minute. The long spiral peel is fun to play with and yes, the dog got a peel to eat (only one, don’t want potty issues) You can see the peel on the right side of the picture. However it does not do pears very well.
So in comes my brother Doug.
He is going to use his knifes skills to slice and dice those pears and apples.
Chop, chop chop
Although it looks like he is about to cut his fingers off, I promise you no fingers were injured in the making of this pie (except the pain from the pastry cutter).
Ok, as a side note, this Hoosier Mama cook book is great except it uses a light brown font. Although it creates an ambience that is fitting for the book, it does make people with old tired eyes make mistakes.
I put the apples/pear combo into the oven without putting on spices.
Oh how I am reminded of the time when my grandmother made an pumpkin pie for Thanksgiving and she forgot to add the spices. She ended up sprinkling them on top of the pie.
Yes, it will happen to you when you get older. It will. I promise.
I quickly pulled out the apple/pears from the oven and then tossed them in the spice sugar mix. Hot apples are much harder to toss in a spice sugar mix than room temperature. Just sayin’
Finally after baking for 40 minutes, I added the cranberries.
The mixture is finally cooked. The book said to wait until it cools. However I did notice on blind baking pie crusts it did not tell me if I had to wait until the crust cooled before baking again. I looked everywhere. I googled. I watched videos. Anyone? Anyone? So I filled the hot crust with the cool apple mixture.
Now I was smart enough to read the cookbook to make the crumble ahead of schedule. Thank goodness I did. It requires cooling in the fridge. Darn butter. Everything about this pie is a pain. Cook. cool. wait. cook. cool. wait. I am renaming this the 14 hour pie. Dang.
Ok, it is going in the oven for the last time. Home stretch.
Thanksgiving Day
The turkey was good. The stuffing too. Lots and lots of good food to eat and good stuff to drink. Time for dessert.
By now there was such a buildup of the long awaited pie.
Comments received
“It is Sweet and Tart at the same time”
“WOW, this is good”
“Not too bad”
“We need whip cream”
“I think the crust is too dry” (that one was from me)
At least the entire pie was eaten, no complaints and from what I hear from the family, no one got sick! A SUCCESS!!!
And the crust was too dry……oh well, more water next time.
Prepare pan (lightly greased 12×9″ pan), I grease with the left over butter
Mix butter, sugar and milk in a large saucepan or stockpot. Bring to a full rolling boil on a medium heat stirring
constantly. Continue boiling for 5 minutes on medium heat or until candy thermometer reaches 234 degrees – stirring
constantly to prevent scorching. Remove from heat. Gradually stir in chips until melted. Add marshmellow cream
and vanilla. Mix well. Pour into prepared pan.
So today Ms Olive and I delivered the cookies to the neighborhood. She wore her Santa Costume and looked so cute.
To wrap the cookies, I created a cookie box using a plain old white box from target (the kind you wrap gifts in the christmas wrap department). I used just some plain brown paper and crumpled it. then I dotted the paper with distress ink. After adhereing them ot the box I lined the box with foil and some pretty tissue paper. On top I added one of those cool chalkboard labels that I love. Of course I used bakers twine.
Chalkboard Christmas labels can be found at Worldlabel.com
It is that time of year!!!! My sister Janice and I got together at my house to make our Christmas Cookies. Since this Christmas I am not working, I wont be giving cookies to my co-workers, but instead I am thinking of giving cookies to The Cat Doctor staff and the local Fire Department. Hope they appreciate it.
This year we made the following cookies
Praline Pecan Fudge
Traditional Fudge
Peanut Blossom Cookies
Peanut Brittle
Pecan Bars
Turtle Cookies
Snowball Cookies
Pecan Nougat Cookies
Butterscotch Squares
Since it was a rainy Weekend we could not make the Meringues or Southern Pralines!!!
Snowballs….yummy buttery goodness
Pecan Praline Fudge
Peanut Blossom Cookies
Fudge
Peanut Brittle
Pecan Nougats
Pecan Bars
Have you noticed a theme of pecans!!!! It is our favorite NUT!!!!
Every Christmas I insist my sister Elaine make her famous pralines…. here is the recipe
2 cups light brown sugar
1 cup heavy whipping cream
1 cup pecan halves
1/2 teaspoon vanilla
Combine brown sugar and cream in a large saucepan. Stir until the sugar is melted hen boil to 236f (soft boil stage).
Remove from fire and stir in vanilla and pecans. Stir until the mixture begins to thicken and becomes sugary (you can taste the sugar). Let the mixture cool somewhat before large spoonfuls of pralines on silicon sheets (or wax paper on cookie sheets).
When completely cool, wrap each piece in a cellophane bag. They are delicate so be careful when stacking.