I decided to choose Amy Sheffer’s project idea to make my card. I have never really stamped fabric, but it does not look that hard.
Now it’s your turn! Create a project featuring stamped linen wraps. You can choose to re-create the exact project from Amy above or design your own using the same concepts. Your project must also incorporate at least one Papertrey product.
At first I was not too thrilled about doing this project, but then after kicking it around for a while I had an idea. I can definitely make a card. I really like how it turned out.
I really got excited about this challenge. This was a fun technique that I think I will use again and again. It is a great technique to use for masculine cards.
Now it’s your turn! Create a project featuring faux leather. You can choose to re-create the exact project from Ashley above or design your own using the same concepts. Your project must also incorporate at least one Papertrey product.
Here is a close up, dang if it doesn’t really look like leather.
Supplies:
Stamps: Papertrey Ink Stylish Sentiments Birthday
Ink: Papertrey Ink Cocoa Bean
Paper: Cocoa Bean Card Stock
Embellishments: Tim Holtz Idealogy Muse Tokens; Papertery Ink Cream Twine.
The 2nd anniversary challenge is do make an item with cotton.
I chose the 2nd option by Michelle Leone
She made a cute lavender sachet.
Now it’s your turn! Create a project featuring some kind of die-cut fabric flowers. You can choose to re-create the exact project from Michelle above or design your own using the same concepts. Your project must also incorporate at least one Papertrey product.
I wont be making a sachet pouch as I tend to focus only on cards.
Since the challenge was die cut flowers I thought I would get out some of those older die cuts and make a simple flower card. sorry for the dark lighting but I get home way too late to get a good shot.
Supplies:
Paper: Neenah Solar White Card stock, Papertrey Ink Ombre Stripes Patterned Paper
We are kicking off with Cotton as the 1st Anniversary Tradition challenge. The lovely and talented Laura Bassen created a wonderful card loaded with color. Below is her beautiful card and the inspiration for my card.
Now it’s your turn! Create a project featuring paper scraps and vellum overlays. You can choose to re-create the exact project from Laura above or design your own using the same concepts. Your project must also incorporate at least one Papertrey product.
OK, now that I have the challenge and have the rules to follow, here is my card.
Supplies:
Stamps: Papertrey Ink Keep it Simple: Love Stamp Set
To start we have an awesome challenge to get our minds in the creative mood.
First we are to select an inspiration photo from their site. I choose this picture
I loved the berries and the cool green and blues. It is so me.
Now it’s your turn! Create a project using one of the ten photos/color schemes above as your inspiration. Your project must also incorporate at least one Papertrey product.
I ended up making this card for the challenge. It is a little hard to see the glitter pen marking on the leaves.
Supplies:
Stamps: Papertrey Ink Leave It Be Stamp Set, Papertrey Ink Tinsel and Tags Spring Stamp Set
Inks: Papertrey Inks: Dark Indigo, Blueberry Sky, Spring rain, New leaf, Green Parakeet
Die Cuts: Memory Box-A Lovely Smile Die
Embellishment: Little Things by Lucy – phosphorescence, Pretty Pink Posh – Seattle Spirit Mix
Paper: Neenah Solar White Card Stock, Papertrey Ink Dark Indigo Card Stock
Thanks for taking a peek, and even more thanks for leaving a comment.
Well it has been a whole year since the last Stamp-a-Faire event and I look forward to this one.
This one should be a doozy since it is their 10th year Anniversary! The theme this year is Anniversary! LOL Imagine that. Going with traditional themes on annversaries I should see the following ideas flow from the creative team over at Papertrey Ink!
Here is the list of traditional gifts that we will focus on. There will be designers for each anniversary, however I will only focus on doing one card for each anniversary. Makes it much easier for me to actually finish the challenge.
As always, my lovely sister will join me. I hope she posts her cards for all to see.
Ok, lets go!!!
I like to create goodie bags for events at my house. This year I went for the black and white theme.
I got the following from Michaels:
Black tray, Note pad with Initial, Flip message Pad
The rest I got from Amazon
My Favorite Things Black and White pattern paper, Black and white bakers twine and a black pen with a big old diamond on top
I also got the following:
A tote bag with my initial on it. (also Michaels) and now you can see the tray.
It has been a while, sometimes I forget that I have a blog. Not that I have any followers, but it is nice to know there is place to put all my ramblings and crafts.
So I just finished the baby quilt for my Great Grand niece.
Now that makes me sound old, but really, the all just stated when they were young….really.
So this new member of the family is my sisters oldest daughters, daughters, daughter.
Or my nieces daughter had a baby. Which ever helps you figure out the connection.
I decided to make a baby quilt. I have been quilting more and more and really trying to do free motion quilting. Basically I am really bad at it, but one has to practice to learn to do this.
This is the little gem. The middle was a little bland so I added a little bird.
It was still bland so I added the embroidery. I swear the embroidery took longer than putting the quilt top together.
As you can see I did some stippling in the white area around the bird.
I then added some walking foot work.
Speaking of walking foot, the Craftsy class by Jacquie Gering is awesome. This is one of my favorite classes and has taught me so much. Especially since I was afraid to free motion, using the walking foot was less scary.
I added in some swirls and other designs. But please do not look closely at my work.
and finally I made a special tag
I finally mailed it off today, cannot wait for her to get it.
I also mailed a crochet baby blanket my Mother made. When she died I found a collection of baby blankets that she made. I decided to keep them and give them out to my families future generations. It means so much to know my Mom can still give the baby blankets to the new little ones.
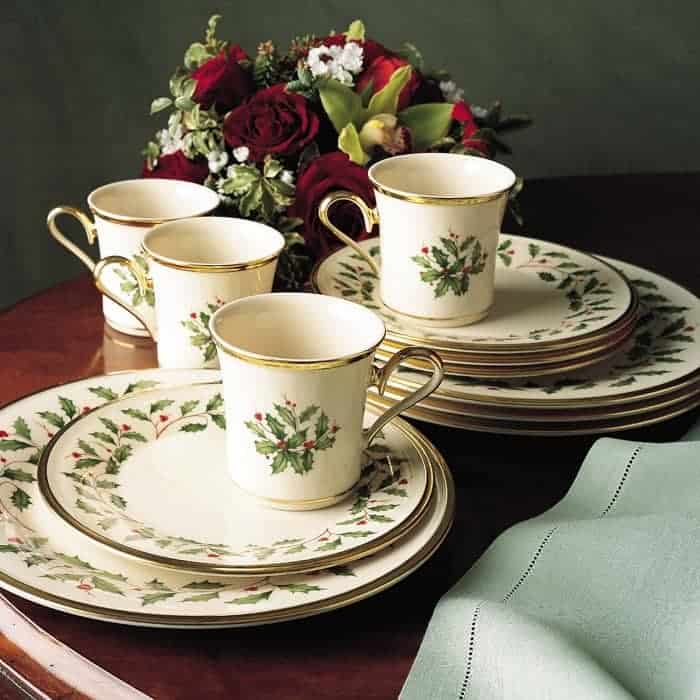
For years and years I have been collection Lenox Holiday China.
I have the entire place settings for 12 people and a ton of matching accent pieces.
Fortunately for the last few years it has just been grabbing the new pieces and the great sale items. No huge ticket items. All bought and done with! I swear I must have everything.
This year I have added these two beauties to my collection:
The Lenox Holiday Covered Dish – 6-1/2 x 9-1/2
The Lenox Holiday Round Platter – 13″
I love how they tell me it is dishwasher safe, like I would EVER put my china in the dishwasher.
I really need to inventory my china. But more importantly, I need to have a dinner party again.
From the Country Cook (click on photo to go to their link)
Do any of you post your recipes as a way to keep from losing those darn little recipe cards. My recipe box is a mess. I have to search and search to find recipes in it.
So I have been putting them on my blog. Not only because I lose them, but my sister does also. She is always texting me asking me for a recipe. Yes, I am talking about you! Now all you have to do is go to my blog.
My Mom use to make a meatloaf that we loved. She would use tomato rice soup instead of catsup and we loved it.
I snagged the photo from the Country Cook so please click on it to go to their site. I am really bad at taking pictures of food when I am hungry. Hee Hee.
Mom’s Meatloaf
1-1/2 Pound Hamburger Meat
1 Egg
3-4 Slices of dried bread chopped to crumbs
1 T Dried Onion
1 t Salt
1 t Pepper
1/2 t Marjoram
1 T Whorechestere
1/2 can tomato rice soup
Mix well, put in a casserole dish or bread pan that has been sprayed with oil (Pam or shortening)
Pour remaining soup on top, spread evenly.
Cook 1 to 1-1/2 hours at 350 degrees.
Take cleaned, fork poked potatoes and coat with shortening. Place on rack next to meatloaf.
I have been missing for a while. Been busy quilting which I normally do not blog about, but will soon. I am trying to finish a Halloween quilt that I started 2 or 3 years ago. Or it could be 4 or 5 years ago.
I finished the piecing and now am quilting it. The big challenge is that I wanted to learn to do free motion, so part of my quilt was done with a walking foot and the other parts are free motion.
I basically suck at it, but it is a new skill so I just need to practice to get better. I actually do not mind doing this on an actual quilt versus a spare fat quarter. I am hoping it will be a reminder of where I started (that is if I get better).
On to Halloween!
I did my normal decorating, pumpkins that light up, spider webs, etc. I added a new bone spider, bone rat and and bone vulture.
I also like to get the big candy bars and be the cool house. But the last two years I have seen a trend where large groups of children come together. About 10-15 in a group. As you can image this wipes out the candy pretty fast and with that volume, I cannot even stop to see the costumes. I prefer the one or two children at a time deal. Of course the little boy next door showed up twice just like he did last year. I told him to stop doing that and I would run out of candy. LOL He could have least changed his costume or waited for a huge group and confuse me. Too funny!
Speaking of children, the last two children of the night wore this adorable NASA suits and you put the candy down the flexible silver tube (aka dryer exhaust hose) it drops into their air pack on their back. Sooooo cute.
This year I added two new items, an electric fence light that made “sparking” noises when you got near it.
I ended up putting it on the baby gate that I use in the doorway so the dogs do not get out when I answer the door.
The other goody I got was a short-circuit lab light bulb that fizzled in and out like one of those spooky haunted laboratories that mad scientists do human experiments! Eeekkk!!!!! This one is sold by Gemma in case you want one. I got mine at Wal-mart.
It has a little switch that you can either make it motion sensor or not. I liked it a lot. Made it real spooky.
I also dress up the dogs like a good dog mom. Doug resisted Eli getting dressed but I think he really thought he was cute.
He was a prisoner of Love.
It was a tad bit tight but he did just fine. The label on the back glows in the dark. I just love how it looked on his hind legs. So cute.
Olive was a dinosaur! A cute one I might add. Olive does real good with costumes.
You can see her costume better on the video below.
Penny on the other hand HATES costumes and sweaters. She is 100% dog and does not like that sort of thing.
She does make a cute little panda. Look at that panda tail on her back. So cute.